The single Hybrid App can be developed to work for multiple cross platforms, which there by reduces the development efforts by overcoming the need for developing separate Apps for different devices and OS platforms.
As the native programming languages are not used for building the Hybrid Apps, these Hybrid Apps are slower when compared to Native Apps.
Hybrid Apps are nothing but the Web Apps which are wrapped inside a Native App layer, the Native App layer of Hybrid Apps connect the web browser capabilities to the mobile platform capabilities.
As the Hybrid Apps are the combination of Native Apps and Web Apps, they run on the Mobile Devices and can use the mobile devices specific hardware and software like Camera, Contact List, GPS etc. similar to Native Apps.
Hybrid Apps can be installed on the mobile devices from their Play Store or App Store.
Examples for Hybrid Apps: Gmail, Uber, Sworkit etc.
App Testing Versus Device Testing
Mobile Testing can be categorized into the below two types:
- Mobile App Testing
- Mobile Device Testing
Mobile App Testing is related to testing the working of the given Mobile App by installing it in the supported Mobile Devices.
Where as Mobile Device Testing is related to testing of the Mobile Device itself.
Sometimes, Device Testing is also called as Mobile Testing.
Hence it is better to call App Testing as Mobile App Testing instead of Mobile Testing.
Click here to find more about Device Testing.
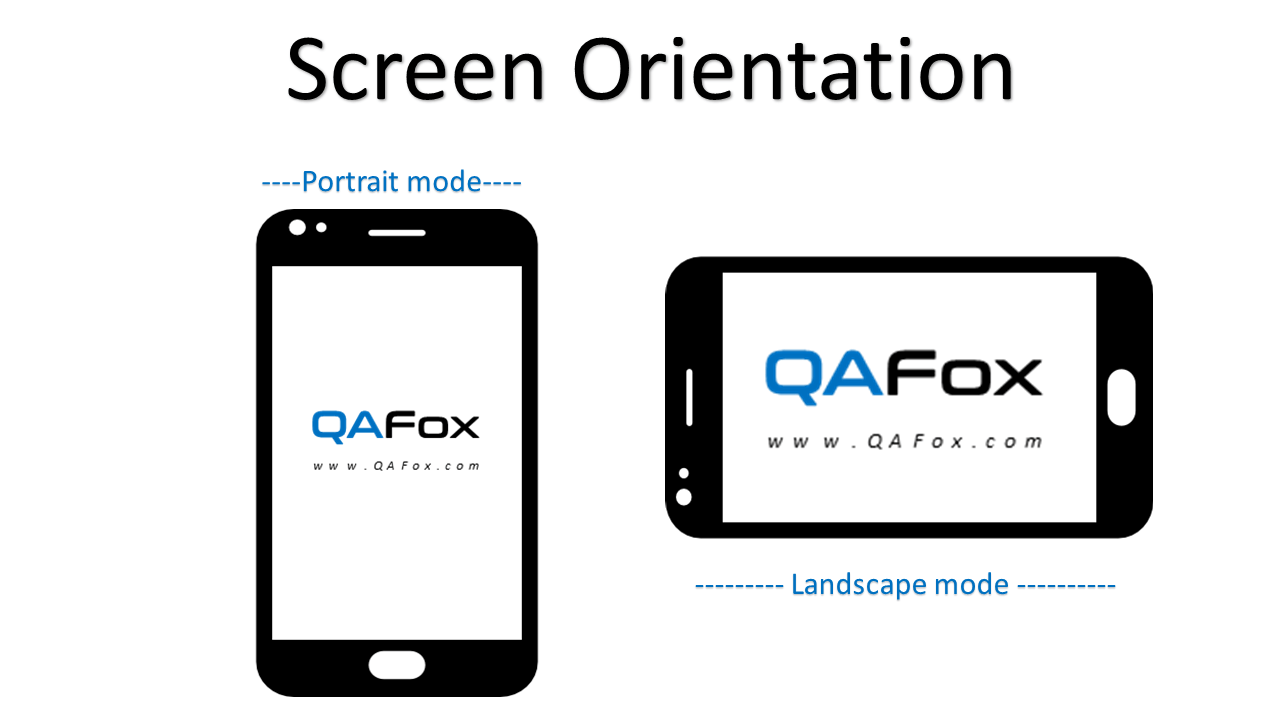
Screen Orientation and Mobile App Testing
While testing the Mobile Apps, we rotate the mobile device screen from Portrait mode to Landscape mode to check whether the mobile application is working properly in different supported modes.
The Mobile App if supported in both Portrait and Landscape mode, on changing the modes the application will rotate itself to adjust itself to the rotated mode.
We need to find out from our Clients whether the Mobile Application under test has to work in both Portrait and Landscape modes. If the client requirements are to test the application in both modes, then we have to test the working of the application in portrait and landscape modes.
And if the Mobile application is only supported in Portrait mode, still we need to check in Landscape mode to see the Mobile application is not rotating to adjust itself to the Landscape mode.
In order to test the Mobile App in different modes, we need to change the ‘Screen Rotation’ option in the Mobile devices as shown below:

Mobile Gestures
Mobile Gestures are the different ways of movements made by the user on the mobile screen for interacting with the mobile device interface.
Having the knowledge of different mobile gestures will help you in writing the test cases in a better way or communicating the things to others in a better way.
The below are the different Mobile Gestures we generally use:
Tap
Instead of clicking on a button or option, in Mobile App Testing we Tap our finger on the mobile app screen for selecting and displayed option.

Image Credit: Touch Gesture Reference Guide
Example: Open your smart phone and Tap on any application to launch/open it.
Double Tap
Double Tap is a gesture, where we Tap on the mobile device screen twice.

Example: Open any article in your mobile browser which displays some text and Double Tap on any word displayed in the article to get Copy, Share and other options (Try in Android Phone).
Flick
Flick is a gesture, where we place a finger on the screen and quickly swipe it in any required direction for faster scrolling (horizontally or vertically).

Example: Lets say you have hundreds of contacts in your mobiles, open the Contacts in your mobile and quickly swipe up or down with your finger for faster scrolling through your contacts.
Pinch
Pinch is a gesture, where we place two fingers on the screen and move them together for zoom in purposes.

Example: Open Google Map, put your fingers on the displayed map and drag these two fingers together to zoomin the map. We can also try this with any image on our smart phone.
Spread
Spread is a gesture, where we place two fingers on the screen and move them away from each other for zoom out purposes.

Example: Open Google Map, put your two fingers on the displayed map and drag these two fingers away from each other to zoom-out the map. We can also try this with any image on our smart phone.
Long Press
Long Press or Press is a gesture, where we touch the screen and hold it for a period of time.

Example: Touch an App on the mobile screen and hold it for a period of time, until you get options to uninstall the app.
We can also try this for sending voice message in whatsapp app, where instead of typing text in the text box, we will touch and hold the mike icon beside the text box to turn on the voice recording mode in whatsapp.
Swipe
Swipe is a gesture, where we touch the screen and move the finger without releasing from the screen in any required direction.

Example: In any Android mobile, touch the screen on the top and move the finger without releasing from the screen in the downwards direction to open the Notifications.
Other Gestures
Apart from the above explained commonly used gestures, there are many more gestures available in different mobile devices and platforms.
Splash Screen
When you launch any mobile application, most of the mobile applications will show us a Splash Screen.

For example, launch a Facebook App on your mobile. Before you see any facebook functionality in the App, a Splash Screen will be displayed for a short span of time.
You can see the Splash Screen for more time, when you launch the same facebook app for the first time in your mobile device.
Splash Screen is also called as Launch Screen or Startup Screen.
The below are the different reasons for the Mobile Apps for displaying a Splash Screen:
- Branding Showcase
- Displaying the Splash Screen till the actual Application completes processing and loads
Real Device versus Emulators/Simulators
As most of the mobile applications developed these days, has to work across a huge number of mobile devices types, mobile OS platforms, OS Versions and other differences.
It will be a huge cost burden for the Testing Service Providers to arrange all the supported mobile devices for performing mobile testing on the real devices.
How to overcome this cost burden?
The answer for this is to use the Emulators and Simulators in place of real devices.
So, what are Emulators and Simulators?
Mobile Emulators and Simulators are nothing but the Software Programs which will help us in simulating the features of the real devices which are actually required for our mobile testing.

Though we overcome the cost burden of procuring the real mobile devices by replacing them with the Emulators and Simulators, we still have to face the below challenges with the Emulators and Simulators:
- Emulators and Simulators are slow when compared to real mobile devices. We have to get used to it while testing the mobile apps on them.
- At the end they are not real and they are just the simulation of the real devices, so in very rare cases they may result in false results. Hence the results may not be so accurate as the results we get from testing on the real mobile devices.
- Cannot simulate the real device battery
- Cannot simulate the real device camera
- Cannot simulate the real device memory
- Cannot simulate the interruptions like incoming calls, notifications and messages
- And many others
Because of the above challenges that we have to face by testing the mobile applications on Emulators/Simulators, we have to use at-least few possible real devices which we can procure in our budget and use the Emulators/Simulators when we are going out of our budget. This way, we can speed up our testing, use the real features of the device which cannot be simulated and improve the accuracy of the test results.
Before moving a head, we need to know that the Emulators are different from Simulators.
I will explain the difference between Emulators and Simulators at a later point of time in this article.
Now, lets find out the Software Programs that are there in the market for Emulating and Simulating the Mobile Devices.
The below are the two popular Emulators/Simulators that are there in the market:
- Android SDK (Emulator)
- iOS Simulator (Simulator)
Android SDK (Emulator)
Android SDK (Emulator) is for mimicking Android Apps on Android OS Virtual Devices.
In order to use Android SDK (Emulator), lets download, install and configure Android Studio (which includes Android SDK).
Follow the below articles for downloading, installing and configuring Android Studio in your Windows machine:
- Downloading and Installing Android Studio
- Configuring Android Studio
- Launching Android Studio
Once the Android Studio is downloaded, installed and configured in your Windows machine, follow the below articles for creating, configuring and Launching the Android Emulator.
- Creating an Emulator in Android Studio
- Configuring Emulator in Android Studio
- Launching the above created and configured Android Emulator
You can also go through the Android Studio Emulator option at the below link:
- Android Studio Emulator Options
iOS Simulator (Simulator)
iOS Simulator is for making iOS Apps on iOS OS Device like iPhone, iPad and others.
We need a Mac computer to experience this simulator.
Follow the below steps for using iOS Simulator:
- In Mac computer, download and install Xcode from the App store.
- Go to Applications, open Xcode > Contents > Developer > Platforms > iPhoneSimulator.platform > Developer > Applications and select iOS Simulator
- Simulator for iPhone will be launched by defualt
- Now select, Mac Hardware Menu on the top and select Device > iPad and observe that the iPad will be launched.
Click here to watch the above steps in a video.
Emulator versus Simulator
In the above sections, I have explained how to use Android Emulator and iOS Simulator.
As you got some idea about the famous Emulators and Simulators we use for testing Mobile Apps, now lets understand the differences between the Emulator and Simulator from the below points:
- Emulators and Simulators have small differences, hence these words are used interchangeably.
- Simulators only mimics the activity/behavior of the Mobile Devices, without mimicking the original mobile device. Its just like a ‘Flight Simulation’ program which only makes you believe that you are going from here to some place on flight, but in reality you are not actually moving.
- Emulator on the other hand is like a Virtual Device which works like the original mobile device.
But at the end, despite of these differences between these simulators and emulators, we use both of them for testing our Mobile Apps when real mobile devices are not in place.
Mobile App Testing Types
There are different types of Testing which need to perform as part of Mobile App Testing.

The below are the different types of Testing that we need to perform on the Mobile App:
Functional Testing
Functional Testing is performed to check whether the Mobile Apps are working as per the requirements specifications (Verification) and end user needs (Validation)
Compatibility Testing
Compatibility Testing is performed to test whether the Mobile App is working on all the supported Mobile Device Models, OS Platforms and Versions.
Compatibility Testing plays a key role in Mobile App Testing, as there are many Mobile Devices in the market on which the developed Mobile App has to work.
As there are huge number of possible Mobile Devices on which our Mobile App has to be tested, we need to create a Test Matrix of supported Mobile Device Models, OS Platforms and Versions.
And also we need to prioritize the supported Mobile Device Models, OS Platforms and Versions and perform the high priority things first.
Usability Testing
As part of Usability Testing the Mobile App, we need to check the below:
- How easy it is the App functionality for the user to understand and use without any confusions.
- User is able to navigate through all the App Screens in a smooth manner without any confusions.
UI Testing
Testing the GUI of the Mobile Application to check whether it is according to the requirements and end user needs.
Things to verify as part of Mobile App UI Testing
- All the UI elements on the Mobile App are aligned properly
- All the UI elements are in proper size
- All the error messages are displayed properly on the Mobile App Screen with correct font color and font size
- All the scroll bars (horizontal or vertical) are displaying correct on the Mobile App Screen when required
- All the text on the Mobile App screens is readable
- All the text on the Mobile App screens has the required font
- All the text on the Mobile App screens is fitting into the screen
- All the text on the Mobile App screens is not overlapping with other UI elements.
- All the text on the Mobile App screens is not trimmed out due to less space on the screen
- All the text on the Mobile App screens is properly aligned
- All the text on the screen has the correct font color
- All the images displayed on the Mobile App screen are displayed with good clarity
- Checking whether the text is spelled correctly on the Mobile App Screens
- Testing the Mobile App on different screen resolutions for finding any UI issues
- Testing the Mobile App on the different supported Mobile Device Models, OS Platforms and versions with an intention of finding the UI issues.
- Testing whether the Mobile App screens has attractive GUI
- Testing the color consistency of the different UI elements across the Mobile App screens
- And many more
Installation Testing
Installation Testing is performed to check whether the User is able to install and uninstall the Mobile Apps smoothly without any problems.
Things to verify as part of Mobile App Installation Testing:
- Installation of Mobile App needs to be tested across various supported Device Models, OS Platforms and Versions.
- Checking whether all the instructions are provided properly during Mobile App Installation
- Stopping the Mobile Application Installation process in between, should take back the system to the clear state.
- Installing the latest version of the Mobile App on the existing older version of the same Mobile App and check how the situation is handled
- Forcefully stop the Mobile App Installation and check how the situation is handled
- Install the Mobile App using default options
- Install the Mobile App using customized options
- Install the Mobile App, while the high RAM using application is running the Mobile Device.
- Check how the Mobile App Installation handles the errors, if they occur during the App Installation
- Check how the Mobile App Installation is changing the registry files in the Mobile Device
- Install the Mobile App while a similar other Mobile App is already running on the Mobile Device
- Install the Mobile App when there is insufficient RAM to allocate in the Mobile Device
- Installing the Mobile App to check the Disk Space Availability on the Mobile Device
- Install the Mobile App to check how much Disk Space is consumed by the Installed Mobile App
- Install the Mobile App where there is insufficient Disk Space available in the Mobile Device
- Install the Mobile App when the Mobile Security Options are enabled and Mobile Security Firewall is turned on
- Install the Mobile App by connecting to internet through WIFI
- Install the Mobile App by connecting to internet through 4G LTE network
- Install the Mobile App by connecting to internet through 4G network
- Install the Mobile App by connecting to internet through 3G network
- Install the Mobile App by connecting to internet through 2G network
- Check what happens when your internet connection goes out of reach during Mobile App installation
- Check what happens when your internet connection goes out of reach for a while and re-establishes connection during Mobile App Installation
- Check what happens when your internet connection switches between WIFI, 4G, 3G, 2G and others during Mobile App Installation
- Install the Mobile App when your Mobile Device is connected to multiple networks say WIFI, 4G at the same time.
- Install the Mobile App at different internet speeds (i.e. check the mobile app installation at very low speed to very high speed)
- Check the time taken for installing and uninstalling the Mobile App on different supported Mobile devices
- Checking the logs recorded in the log file during Mobile App Installation
- Install the App updates on the existing Mobile App on your mobile device to check whether the Mobile App is getting updated properly
- Testing the Mobile App Installation during interruptions like Phone Call, SMS, Notifications, Low Battery etc.
- Checking the Mobile App Installation in SD card of the Mobile Device
- Checking the Mobile App Installation in Phone memory of the Mobile Device
- Uninstallation of Mobile Apps needs to be tested to check whether the Mobile App related files are removed from the Mobile Device along with the App.
- And many more
Performance Testing
Performance Testing has to be performed at Device, Server/API and Network levels while using the Mobile Apps.
Things to verify as part of Mobile App Performance Testing:
- Checking whether the Mobile App is taking less time to launch (i.e. not more than 2 seconds after tapping the App icon from the Mobile Device Screen)
- Checking whether the Mobile App is not using more battery while using it constantly (i.e. Excess use of battery or other resources on the Mobile Device will result in Mobile Device Slow down and heating)
- Checking whether the Mobile App is not using more Memory while using (This will slowdown the Mobile Device if more memory is consumed by the Mobile App)
- Checking whether the Mobile App is performing well across the supported Mobile Device Models, OS Platforms and Versions.
- Checking whether the APIs behind the Mobile App are communicating with the App Server is a faster way for converting, sending and loading data
- Checking h0w many API calls are made by the Mobile App for getting the things done (i.e. The more API calls will degrade the Mobile App performance)
- Appropriate notifications to be displayed by the Mobile App to the user, when there is a network latency while using the App
- Checking how the Mobile App is performing on different networks like 2G, 3G, 4G, 4G LTE, WIFI etc.
- Checking how the Mobile App is performing in different circumstances (when you are in the lift, car parking cellar etc.)
- Checking how the Mobile App is performing when a load of users are using it simultaneously.
- Checking how the Mobile App is performing when the user is using it in a stressful way to its limits.
Security Testing
Security Testing is performed to check whether there are any security loop holes (i.e. Security Bugs / Vulnerabilities) in the Mobile App which allow the hackers to find them and use them for penetration / hacking purpose.
Security Testing on Mobile Apps testing is a vast subject and below are the basic things we check as part of Mobile App Security Testing:
- Whether the Mobile Application is asking you to create strong User Login Credentials
- Whether the Mobile Application is not storing the Login Credentials or any sensitive data as it is in its Database (Proper encryption should be followed while storing the sensitive data)
- Whether the Mobile Application is getting timeout after keeping the Mobile App idle by not using for a period of time
Apart from the above basic things, we can perform a detailed Security Testing on the Mobile Apps with an intention of finding any security loopholes (i.e. Vulnerabilities / Security Bugs).
For more information on how to perform extensive Security Testing on Mobile Apps, click here.
Interruption Testing
Interruption Testing can be performed on the Mobile Apps to check how the Mobile App in use will behave when it comes across different interruptions in the Mobile Device.
The below are the different interruptions that we face while using the Mobile App:
- Incoming Phone Call
- Incoming SMS
- Other App Notifications
- Other App update notifications
- Mobile Device OS Update Notifications
- Low Battery Mobile Device Notification
- Mobile Fully Charged Notification
- Incoming Video Call from other Apps (Say Whatsapp)
- Income App Chat Message Notifications (Say Whatsapp)
- Mobile Switched Off
- Mobile Alarm
- Mobile Reminders
- And other different interruptions
While these interruptions occur during Mobile App usage, the Users may decide to act or ignore based on the type and need of the notification.
For example, we got an important Phone call while using the Application, we accept the phone call and the mobile app should run in the background and restore once the User completes the call.
And in some other cases, the user may decline the call or ignore the call, and the App should continue working.
Hence we need to test how the Mobile Apps are behaving based on the User actions when these different types of interruptions occur.
Testing Mobile App in Online and Offline Modes
Some mobile applications are developed to work in both online and offline modes (i.e. with or without internet connection).
The reason for Mobile Apps to work in offline mode (i.e. Without internet) is the Users may travel to some locations where the internet won’t be available and the application has to work in offline mode for the User to use and input data into the Mobile App. Once the Mobile App gets to a location where the internet is available, the data entered by the User in offline mode has to sync.
Hence we need to test whether the Mobile Application is working properly in offline and online modes.
Web Services Testing
Sometimes the Web Services for the Mobile App need to be created in advance, before developing the Mobile App.
While developing the Mobile App, the developers use these Web Services and build the Mobile App on the top of these Web Services.
In such cases, we need to perform a detailed testing on the Web Services, their requests, their responses, positive and negative scenarios by varying the parameters, by providing valid inputs, by providing invalid inputs, by providing all parameters, by providing invalid parameters during request and so on.
Less testing will be required in the actual Mobile Application, when their web services are tested thoroughly before the actual Mobile App is developed.
Mobile Test Automation and Tools
Mobile App Testing can be performed in two ways:
- Manual Testing
- Automation Testing
In this section, I am going to explain about the Mobile Test Automation.

Business photo created by kjpargeter – www.freepik.com
Appium – Famous tool for Mobile Test Automation
Appium in simple terms is a Test Automation tool for testing the Mobile Applications and Mobile Browsers.
Out of all the Automation Tools available in the market for performing the Mobile Test Automation, Appium is the most famous tool.
The following are the different points which makes Appium the famous Mobile Test Automation Tool:
- Appium is an Open Source and Free Test Automation Tool
- While other Mobile Test Automation Tools can automate only Android Apps or iOS Apps, Appium Test Automation is a Cross Platform Test Automation Tool which can automate both Android, iOS and Windows Apps.
- Appium supports good number of programming languages like Java, C#, Python, Ruby, JavaScript and PHP for developing the Test Automation code.
- Appium supports performing Automation Testing on Real Devices, Emulators and Simulators
Apart form Appium, we also have other Mobile Testing Automation Tools.
The following are the different Mobile Test Automation Tools in the market:
- Appium
- Test Project
- Froglogic Squish
- Robotium
- Test Complete
- Ranorex
- MonkeyRunner
- UI Automator
- Selendroid
- MonkeyTalk
- Katalon Studio
- Testdroid
- Calabash
- Frank
- SeeTest
- KIF
- IOS UI
- IOS-Driver
- UFT Mobile
- Telerik Test Studio
- eggPlant
Google Chrome Dev Tools for Mobile Testing
If the Web Applications are Mobile enabled, then we can test whether we can browse our Web Application in the Mobile Devices.
Google Chrome Dev Tools can be used for testing the Mobile Enabled Web (MEW) Applications in the different simulated Mobile Devices.

The below are the steps for opening the Web Application in the simulated Mobile Devices provided by Google Chrome Dev Tools:
- Open the Website to be tested for Mobile View in the Google Chrome Brower
- Press F12 key on your keyboard in Windows machine and observe that the Chrome Dev Tools will open
- If the Chrome Dev Tools are by default displayed at the bottom of the page, then you can move them to right side by selecting ‘Three Dots’ on the Chrome Dev Tools and then selecting ‘Dock to Right’ option
- Now, select the Mobile Device symbol to view the Web Page in Mobile View
- By default some Mobile Device Simulation will be selected, and you can choose the specific device you need from the Mobile Devices dropdown
- Now Test the Website in Mobile Web mode in your desired device.
Apart from the above simulation of Mobile Devices using Google Chrome Dev Tools, we can also simulate the Network (i.e. internet speed), GPS Location and Device Orientation using the Goolge Chrome Dev Tools options.
Click here to explore more about how to use the Google Chrome DevTools for simulating Mobile Devices, Network, GPS Location and Device Orientation.
Form Factor
Form Factor is one of the terminologies used in Mobile App Testing.
So, what exactly is Form Factor?
Form Factor in simple terms is the general look (i.e. style) of the Mobile Device.
Form Factor of Mobile Device comprises of the below things which result in actual look or style of the Mobile Device:
- Size of the Device
- Shape of the Device
- Look/Style of the Device
- Layout of the device
- Position of the different major components on the device
How Form Factor is related to Mobile App Testing?
We may have to check whether our Mobile Apps under test are working with different mobile devices having different form factors.
Screen-fly Tool for Mobile Testing
If the Web Applications are Mobile enabled, then we can test whether we can brows our Web Applications in the different supported Mobile Devices.
Screenfly can be used for testing the Mobile Enabled Web (MEW) Applications in the different simulated Mobile Devices.

Follow the below steps for browsing the Mobile Enabled Web Application on the different simulated Mobile Devices in the Screenfly:
- Open Screenfly.org in any browser say Chrome
- Enter the Web Application URL that you want to browse in the different Mobile Devices and click on ‘Go’ button
- Now select ‘Mobile’ option and select any of the displayed Mobile Device say ‘Apple iPhone 6/7’
- Observe that the given Web Application URL will be displayed in the ‘Apple iPhone 6/7’ simulator
- Also, select ‘Tablet’ option and select any of the displayed Mobile Device say ‘Apple iPad’
- Observe that the given Web Application URL will be displayed in the ‘Apple iPad’ simulator.
After browsing the Web Application URL in the Mobile and Tablet simulators provided in the Screenfly, we can also perform the below operations:
- Customize the Screen size of the selected Mobile Device Simulator
- Refresh the Web Page which is loaded in the selected Mobile Device Simulator
- Rotate the Web Page loaded in the selected Mobile Device Simulator
- Add the vertical scroll bar to the simulated mobile device for scrolling
Taking Screenshots of different Mobile Devices
While testing the Mobile Apps in different mobile devices, we may come across different bugs.
These bugs has to be reported in our defect tracking tool along with proofs.
These proofs can be the screenshots of the Mobile App Screen where the bug has been found.
In-order to take screenshots of the Mobile App screen in our Mobile Devices, we need to find-out the way of taking screenshots in different mobile devices.
Taking Screenshots in Android Device
In any Android Device, we need to simultaneously press the ‘Volume Down’ button and ‘Power’ button of the Device at the same time to capture the screenshot of the current shown mobile screen.

Taking Screenshots in iOS Mobile Device
In any iOS Mobile Devices, we need to simultaneously press the ‘Home’ button and the ‘Power’ button of the Device at the same time to capture the screenshots of the current shown mobile screen.

GenyMotion Tool for Mobile Testing
GenyMotion is an Android Emulator.
We can test our Mobile Apps in the different ready made virtual mobile devices provided by the GenyMotion.

The below are the different steps for using the virtual mobile devices provided by the GenyMotion Emulator solution:
- Download and install the GenyMotion software in your machine
- Launch the GenyMotion
- Install any virtual mobile device in GenyMotion from the displayed mobile device list options
- Run the installed virtual mobile device from GenyMotion
- Use the various GenyMotion options provided for the virtual mobile device that is running
Click here to explore more about the GenyMotion and the options provided by it for Mobile App Testing (Which includes a sample android mobile app installation and testing in the virtual mobile device which is launched in the Genymotion tool)
Mobile App Extensions of major Mobile OS Platforms
If you are using Windows Laptop, and you want to install any Software, then we have to install the Software Program having .exe as extension.
Similarly, different Mobile OS Platforms have different Mobile App extensions.
The below are the major Mobile OS Platforms and their Mobile App extensions
- Android OS – Mobile Apps having .apk (Android Package Kit) as extensions are required for installing
- iOS OS – Mobile Apps having .ipa (iOS App Store Package) as extensions are required for installing
- Windows Mobile OS – Mobile Apps having .XAP (or newer APPX) as extension are required for installing
Kobiton Paid Tool for Mobile Testing on Real Mobile Devices
Kobiton is a paid tool for performing Mobile Testing on Real Mobile Devices.

The following are the different points for understanding how Kobiton Paid Tool is different from other Mobile Testing Tools in the market:
- Instead of testing on Emulators/Simulators, Kobiton hosts several Real Physical Mobile Devices on the Cloud (i.e. Internet)
- We can perform Manual and Automation Testing on these Real Devices which are hosted on the cloud
- We can create an Account with Kobiton and access their Real Cloud Hosted Mobile Devices from our browsers itself.
- And Kobit0n is providing several options like Mobile Gestures, Log Extraction etc. for better testing.
Steps for trying Kobiton Tool’s Free Trial:
- Click on Free Trial option available here – https://kobiton.com/real-device-testing/
- Create an Account
- Verify the Account using the email sent
- Login to the account and try out the real mobile devices which are hosted on the cloud using the Kobiton provided interface
Other Tools for Mobile Testing
Apart from the above explained Tools which support Mobile Testing, there are several other tools.
Mobile Cloud Testing Tools
- Testdroid
- Experitest
- TestingBot
- headSpin
- Test IO
- UI Automator
- IPhoney
- TestFairy
- SauceLabs
- BrowserStack
- Reflector
- Perfecto Mobile
- Remote TestKit
- pCloudy
- AWS Device Farm
Mobile Performance Testing Tools
- dynatrace
- NeoLoad
- Blazemeter
Mobile Security Testing Tools
- OWASP ZAP
- BurpSuite
- Mobile Security Framework (MobSF)
- ImmuniWeb Mobile Suite
- Micro Focus
- And many more
Mobile Network Technologies
Apart from understanding the different Mobile Devices, Mobile OS Platforms, we also need to have knowledge about the Mobile Network Technologies that our Mobile Devices use for day to day communication.
The below are the common Mobile Network Technologies available in the market:
- GSM
- CDMA
- UMTS
- LTE
- And many more
Here ends this article.
Hope you enjoyed it.
Kindly provide your valuable feedback which will motivate us to write more this kind of articles.
Please leave your questions/comments/feedback below.
Happy Learning 
About Me > Arun Motoori
On a mission to contribute to the Software Testing Community in all possible ways.


 Launch your Graphy